- Monday to Friday 8:30am to 5pm
- stores@silvercross.com
- 1.844.352.7677

Stay?
This may involve adapting and improving accessibility in the home to tailor it to specific requirements. Some cost effect modifications that can create independence for your loved one and increase safety in your home are:
Straight stairlift: $3,000 – $5,000
Curved stairlift: $10,000 – $25,000
Porch lift: $5,000 – $10,000
Interior vertical lift: $10,000 – $25,000
Home elevator: $20,000 – $50,000
(above prices include installation)
Go?
Moving to a senior facility will involve a number of initial outlays plus the monthly living expenses shown in the table below which roughly compares independent living, assisted living and nursing homes.
Average cost of movers: $1,000 – $1,500 (2-3 bedrooms)
Average real estate fees for sale: 2.5% of the selling price
(e.g. $10,000 on a house of $500,000)
Average cost of retirement residence (monthly), assisted living or nursing home:
Independent living facility 1 or 2 bedroom apartment | Assisted living facility 1 bedroom, limited kitchen | Nursing home | |
|---|---|---|---|
| Monthly housing | $1,500 - $3,000 | $2,500 - $4,000 | $4,000 - $8,000 |
| Meals | Optional (higher cost) | 3+ | 3+ |
| Personal care | No | Yes | Yes |
| Mobility assistance | No | Yes | Yes |
Almost 100% of Canadians 65 years of age and older reported that they now planned on supporting themselves or their loved ones to live safely and independently in their own home as long as possible – National Institute on Ageing / TELUS Health Survey of 1,517 Canadians conducted in late July 2020. This may involve adapting and improving accessibility in the home to tailor it to specific requirements. Some cost effective modifications that can create independence for your loved one and increase safety in your home.

Bottoms up! Stand at the base of your stairs and look up. You can install on your left (left-handing), or your right (right-handing) since the rail mounts to the stairs, not the wall.
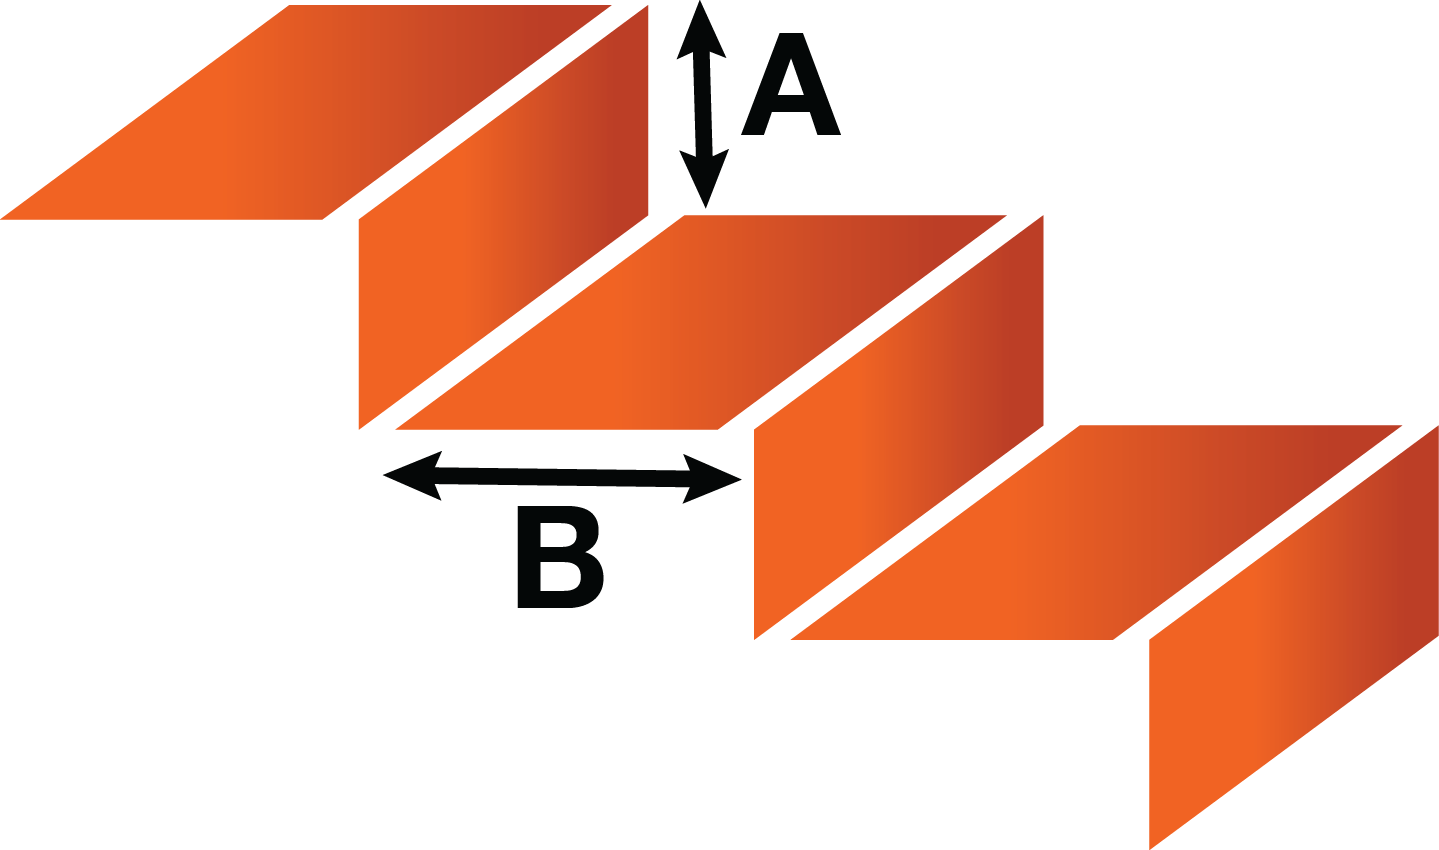
Measure, measure, measure
A = Stair rise height from the nose of the stair down to the step below
B = Stair tread depth from the nose of the stair to the back
Geometry 101: the height of the riser and the depth of the tread yield the angle of your stairs.
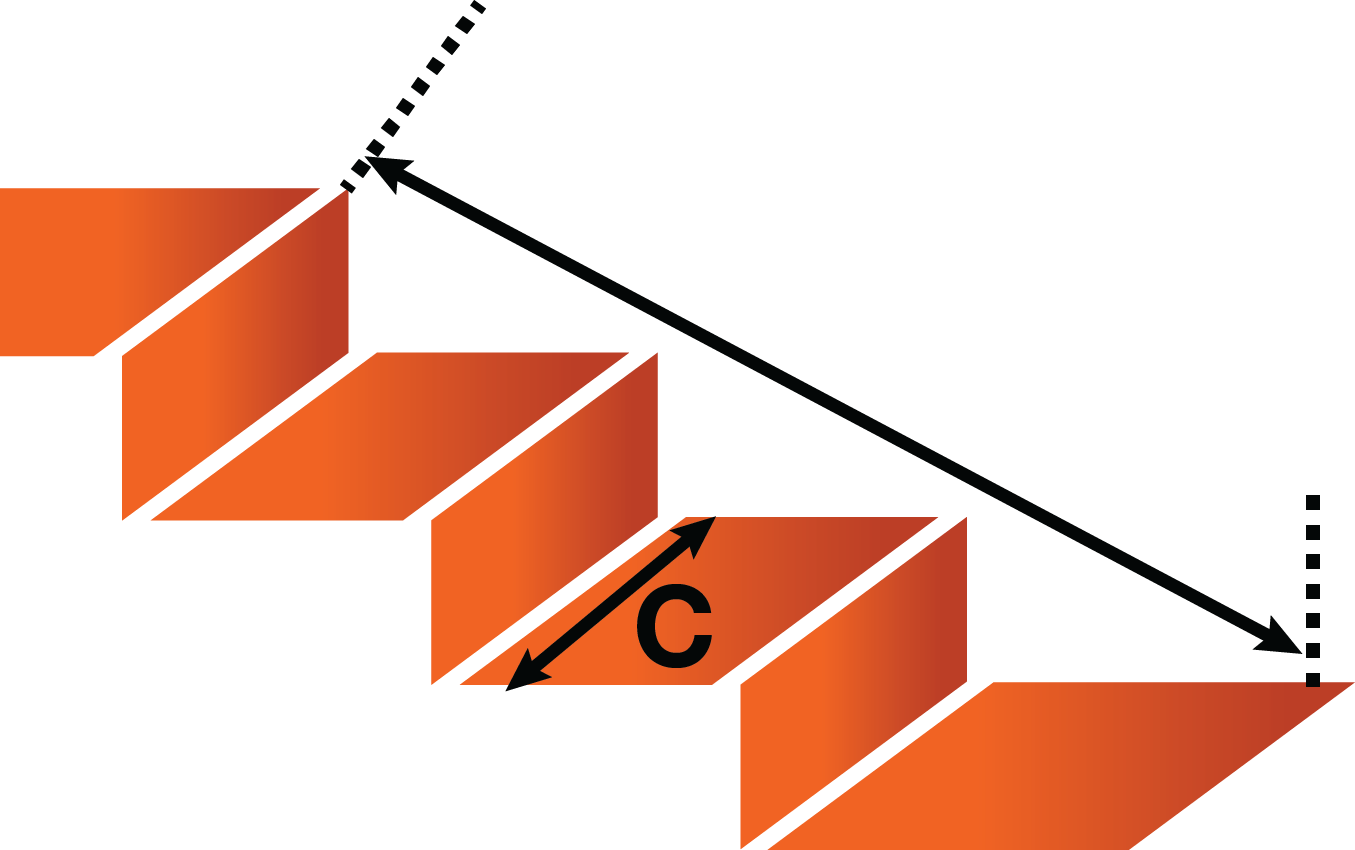
Don’t put that measuring tape away yet! This is the advanced part of the course. We call this “nose to floor” which of course comes after “bottoms up.” This measurement is the travel of the stairs from the nose at the top landing to the floor at the bottom landing. And finally, last but not least, C = Stair width from side to side.

Clearance… What goes up must come down. Take a look at the on and off points of the lift. You’ll need to consider obstructions in your plan. Hey, is that a doorway at the bottom? Get a flip-up rail and problem solved.

Seek professioanl help! A pro will double check the measurements, look for any potential challenges and suggest solutions based on experience. They can also suggest the right product and provide a quote. Take the worry out of your equation!
There are some simple tips to guide you for the installation requirement of a straight stair lift. Straight stair lifts are mounted to the stair treads, not the wall so your stairs cannot be in poor condition. If you have narrow stairs, as is often the case in older homes, look for a stair lift that is more compact – the Savaria K2 features the most narrow profile on the market making it ideal for narrow width staircases. Capacity is important. Stair lifts have maximum capacity ratings and you don’t want to push that limit, so be sure to review that specification.
Outdoor stair lifts are available, but generally speaking, stair lifts are not very happy to operate in cold climates making them rare for Northern climates such as the majority of Canada.
Thinking of doing your own installation? Not so fast. A stair lift is carrying you up and down stairs. Leave it to trained installers. We don’t sell self-install stair lifts and reputable companies agree on this point as a matter of personal safety. Installation usually takes only about two hours for a trained technician.
Silver Cross stores are located in Ontario and Alberta. Some locations are operated by independent franchise owners and others are corporately owned by the parent company Savaria Corporation. Savaria is publicly traded Canadian company (TSX:SIS) and a global leader in the accessibility industry.
Silver Cross Head Office
14 Goodmark Place
Toronto ON M9W 6R1